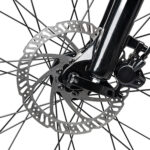
Maintaining your bicycle’s hydraulic disc brakes is essential for safety and performance, particularly for avid cyclists who rely on their bikes for commuting or recreational purposes. Over time, air can infiltrate the brake lines, resulting in a spongy brake feel and diminished stopping power. This guide provides a comprehensive, step-by-step approach to bleeding hydraulic disc brakes effectively.
Tools and Materials Required:
Brake Bleed Kit: Typically includes syringes, tubing, and a bleed adapter.
Compatible Brake Fluid: Ensure the fluid suits your specific brake system.
Clean Rags: For cleaning up spills and maintaining a tidy workspace.
Allen Wrenches: To remove components as needed.
Fluid Catch Container: To collect any excess fluid during the process.
Safety Gear: Safety glasses and gloves to protect yourself from brake fluid.
Step 1: Prepare Your Bicycle
- Secure the Bicycle: Use a bike stand to stabilize your bicycle during the procedure.
- Remove the Wheel: Detach the wheel equipped with the hydraulic disc brake for easier access.
Step 2: Access the Brake Caliper
- Identify the Bleed Port: Locate the bleed port, which is usually situated on the brake caliper, and remove any protective cap.
- Connect the Bleed Adapter: Firmly attach the bleed adapter to the port.
Step 3: Prepare the Syringe
- Fill the Syringe: Draw the appropriate brake fluid into the syringe, ensuring there are no air bubbles.
- Connect the Tubing: Attach the tubing to the syringe and the bleed adapter.
Step 4: Initiate the Bleeding Process
- Inject the Fluid: Slowly push the brake fluid through the line. Monitor for fluid exiting the bleed port.
- Eliminate Air Bubbles: Continue injecting until all bubbles are expelled from the system.
Step 5: Seal the System
- Close the Bleed Port: Once no more bubbles are visible, securely close the bleed port.
- Detach the Syringe and Tubing: Carefully remove the syringe and tubing from the adapter.
Step 6: Test the Brakes
- Reinstall the Wheel: Place the wheel back on the bicycle and ensure all components are secure.
- Test the Brake Lever: Squeeze the brake lever to confirm it feels firm. If it remains spongy, consider repeating the bleeding process.
Maintenance Recommendations:
- Regularly check brake fluid levels to ensure optimal performance.
- Inspect brake lines for any signs of leaks or damage.
- Always use the manufacturer-recommended brake fluid for your system.
Summary
By following these detailed steps, you can ensure that your hydraulic disc brakes operate at peak performance, enhancing your safety and enjoyment while cycling. At S.K. Aggarwal & Co., a leading manufacturer of hydraulic disc brakes in India under the brand name of ‘Sprandom’, we are committed to providing high-quality bicycle components and expert advice to help you maintain your ride. Whether you’re commuting, mountain biking, or enjoying a leisurely ride, properly maintained brakes are crucial for a smooth and secure experience.
Read more about “ Why Quality Matters: A Deep Dive into the Manufacturing Process of Bicycle Brakes ”


