
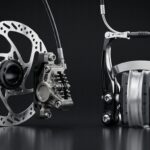


V-brakes are the definition of reliable simplicity. Pull the lever, the bike slows down. Easy, right? But if you have ever had a heart-stopping moment where your brakes just didn’t bite, you know there’s a massive difference between a loose setup and a system tuned for optimal, controlled stopping power. I’m going to walk you through the two non-negotiable secrets our engineers use to pull 100% performance out of every V-brake: mastering cable tension and precision pad alignment.
Mastering Cable Tension: Beyond the Anchor Bolt
Most riders only ever touch the main cable anchor bolt, and honestly, that just gets you close. To find that sweet spot for emergency control, known as modulation you need more finesse.
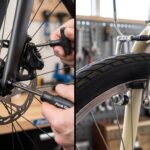
- The Baseline Set: First, loosen the anchor bolt and pull the cable until the brake pads are just about to touch the rim, aim for a consistent 2mm gap on both sides. Crank that anchor bolt down tight.
- The Barrel Adjuster’s True Purpose: That little silver cylinder on your brake lever or noodle? It’s not for fixing a huge problem; it’s for the micro tweak. Use it only for that final, half turn adjustment that sets your perfect lever feel.
- Tension vs. Modulation: Don’t just make it as tight as possible. Max tension gives you a short, grabby lever, which can cause skidding. Aim for a tension that allows the lever to travel about two-thirds of the way to the handlebar grip before the pads bite hard. This controlled travel allows you to brake gracefully in a turn or slam the anchors confidently without locking up.
Precision Alignment: Spring Balance and the “Toe In” Trick
A strong cable is pointless if the pads strike the rim unevenly or scream like a banshee. Perfect alignment prevents squealing and ensures even, long lasting wear.
- Synchronize Spring Tension: Look for the tiny spring tension screws at the base of each brake arm where they pivot on the frame or fork. If one arm is sluggish or the pads don’t return evenly, your braking is instantly lopsided. Adjust those screws until both brake arms retract at exactly the same speed and distance.
- The Squeal Killer: Toe In: This is the most crucial step most riders miss. Toe in means the front edge of the pad hits the rim just a moment before the rear edge. This eliminates vibration and the horrific squealing sound.
Why Quality Parts Matter
You can only tune a brake system this finely if the components were manufactured with tight tolerances in the first place. That’s why we, as a trusted bicycle brakes manufacturer in India, put decades of expertise into every component. By pairing your meticulous cable care with the structural quality of leading bicycle brake parts in India, you ensure that your emergency stops are controlled, predictable, and most importantly safe. Don’t compromise on the one part of your bike that can save your skin.